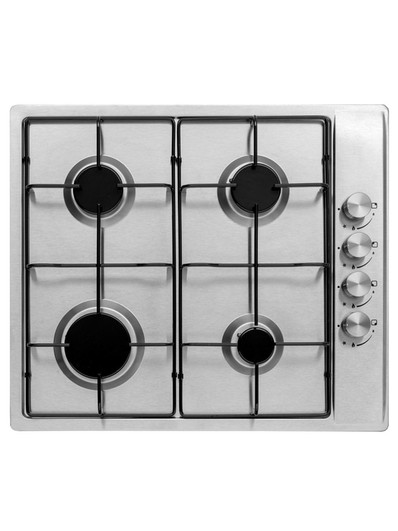
Introducing our high-performance 4 Burner Gas Hob, designed to elevate your cooking experience with precision, efficiency, and style. Crafted with meticulous attention to detail and built to last, this gas hob combines innovative technology with sleek design to meet the demands of modern kitchens.
Featuring four burners, each with varying heat outputs, this gas hob provides versatility for all your cooking needs. Whether you're simmering sauces, sautéing vegetables, or searing meats, each burner delivers consistent heat for exceptional results every time.
The sleek and minimalist design of our gas hob adds a touch of sophistication to any kitchen space. With its seamless integration into your countertop, the hob creates a seamless and stylish cooking area that complements any kitchen decor.
Safety is paramount in our design, with features such as flame failure devices and auto-ignition ensuring peace of mind during use. The durable construction and easy-to-clean surfaces make maintenance a breeze, allowing you to focus on creating culinary masterpieces.
Upgrade your kitchen with the unparalleled performance and timeless elegance of our 4 Burner Gas Hob. Whether you're a professional chef or a home cook, this gas hob is sure to become the centerpiece of your culinary adventures.
4 Burner Gas Hob
RAPID5OFF
Stainless Steel
Gas Hob Colour Description
Stainless Steel Control Type
Rotary Fuel Type
Gas Material
Stainless Steel Supplied With Fixings Supplied, Instruction Manual, Grids and Burner Caps Following these installation tips, you can safely and effectively install a 4-burner gas hob in your kitchen.
Turn Off Gas Supply:
Before beginning installation, ensure the gas supply to the kitchen is turned off at the main shut-off valve. This is crucial for safety.
Check Compatibility:
Ensure that the gas hob you've purchased is compatible with the gas supply in your home. Check the gas type (natural gas or propane) and the pressure requirements.
Measurements:
Measure the cutout dimensions required for the gas hob to fit into the countertop. Follow the manufacturer's specifications for precise measurements.
Ventilation:
Ensure proper ventilation in the installation area to prevent the buildup of gas fumes. Install a ventilation hood if necessary.
Positioning:
Place the gas hob in the designated cutout area on the countertop. Ensure that there is sufficient space around the hob for ventilation and ease of use.
Connect Gas Supply:
Use a flexible gas hose to connect the gas hob to the gas supply line. Use pipe joint compound or gas-rated Teflon tape on the threads to ensure a tight seal. Tighten the connections securely but avoid over-tightening.
Check for Leaks:
Once the gas hob is connected, check for gas leaks using a gas leak detector solution or soapy water. Apply the solution to the connections and watch for bubbles. If bubbles appear, tighten the connections further.
Secure the Hob:
Use brackets or screws provided by the manufacturer to secure the gas hob to the countertop. This ensures stability during use.
Test the Burners:
Turn on each burner individually and check for proper ignition and flame. Adjust the flame as needed using the burner controls.
Final Checks:
Double-check all connections and ensure that the gas hob is securely installed. Test the hob again to ensure it is functioning correctly.
Safety Precautions:
Provide clear instructions on how to safely use the gas hob, including how to turn it on and off and what to do in case of a gas leak.
Professional Installation:
If you're not comfortable installing the gas hob yourself, consider hiring a qualified professional installer to ensure proper installation and safety compliance.